Thursday 24 April 2014

The Bridge At Forgerons (Part 2)


As dawn breaks on the second day these are the positions of the troops they have occupied during the night . Reinforcements will be diced for each move and their entry points randomly allocated.


The Prussians have barricaded the village and await the French onslaught.


The French reinforcements arrive promptly on the first move !.


They deploy ready to attack !.


More French troops move onto the table and manoeuvre to outflank the village .


The Turcos are driven off , but French artillery fire sets the house alight as another attack goes in .


The Prussians are routed ! and the French capture the village .


The French flanking column climbs the steep wooded hill encouraged by Marie Ann !.


The first Prussian reserves arrive - late and in the wrong place .


The French drive back a assault on the village and the Prussians are forced to retire or be cut off.


The doomed Prussian attack .


Bye midday the French have the village , on the left their troops deploy to counter Prussian reinforcements. French cavalry cross the bridge and their infantry cross the river further down and march to secure the right flank. The Prussians were hampered by the late arrival of reinforcements and their artillery at the bridge running out of ammo .


More Prussian troops enter the table but to late now to have any bearing on the outcome of the conflict.


The Chasseurs D' Africa charge over the bridge and rout the Prussian Dragoons as their infantry move up to support them .


As the day draws to a close the French pore troops towards and over the bridge as the remnants of the Prussian troops on that side of the river retire.


The final move of the game and the Prussian threat to the French left is not going to materialise and the Prussian High Command signals their forces to retire - a French victory !. A great game - the poor Prussians were hampered by the non-arrival of reinforcements and when they did arrive they appeared at the least helpful position . The French getting theirs first thing in the morning allowed them to manoeuvre the Prussians away from the bridge and thus capture it. The Featherstone Horse and Musket rules worked brilliantly and gave a quick and easy game.


The moment of triumph !


Wednesday 23 April 2014

Saint Georges Day.


Does one wish people a 'Merry Saint Georges Day ? , I always find it a bit annoying that the rest of the U.K. make a bit thing of their saints days and the English quietly forget their own , so a 'Happy Saint Georges Day' to you all !. 

Sunday 13 April 2014

The Bridge At Forgerons (Part1)


To celebrate my completion of my Franco Prussian project I've decided to do a series of battles with Featherstone's Horse & Musket rules using my newly painted figures . The first part of the battle is a meeting engagement to secure the bridge over the Peit Ruisseau River at the small hamlet at Forgerons . The French force of a Cavalry Brigade , Infantry Brigade and Artillery piece come onto the board nearest the bottom of the photo . The Prussian force appear on the top left hand road and are of a similar composition .


The starting positions were randomly diced for , as was the number of moves - it was to be 10 moves so the engagement started at daybreak and would last all day till evening. The French Chasseures d' Africa lead by Brigadier Camembert move up the road towards the hamlet.


The Prussians move onto the table lead by the 13th Dragoons under Brigadier Bock. 


The forces move towards the bridge and the French Chasseurs charge over it .


But the Prussians have time to expand their formation and counter charge !.


The French loose the melee and flee back over the bridge .


Camembert manages to rally them as the Prussians follow up over the bridge and are themselves counter charged by the French Lancers .

The French Infantry Brigade move up to reinforce the cavalry under general Beaufort.


The Prussian Dragoons are driven back as both sides move their infantry up . One of the Prussian battalions cross the river and the French respond to this by moving a infantry unit to cover their left flank.


The Prussians advance and the Hussars prepare to charge over the bridge.


The situation about midday . The Prussian infantry climb the hill on the left and another one holds the crook in the river near the bridge , the cavalry reorganise at the fork in the roads. The French Chasseurs move to counter the Prussians on their left , the French infantry deploy and start a fire-fight with the Prussians whilst the other infantry unit prepares to charge over the bridge . The French Lancers retire due to heavy casualties on the right covered by the artillery.  


The Prussian Hussars take heavy casualties from the French artillery and flee the field . The French infantry's charge is countered by the much depleted Dragoons who win the melee and force the French to flee. 


With the day coming to a close the French are forced to retire, their infantry finally being rallied by the CinC himself . 


As night falls the Prussians move up to take possession of the village . A Prussian victory on day one with the casualties being about even - French 12 cavalry,18 infantry and 1 artilleryman ., the Prussians 13 cavalry and 14 infantry casualties . Both sides will get back half their casualties back for day two although the cavalry regiments that routed off the table will not appear . Too be continued ...


Tuesday 8 April 2014

Huzza Finished !


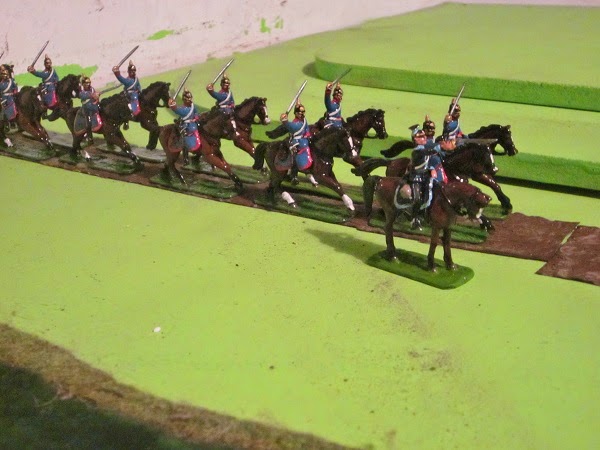
Well Chasseurs D'Afrique actually !, this is the final unit of my Old School Franco-Prussian project and it has taken about 18 months to get it done . It's not often I pre- plan my armies they usually just grow (like Topsy) , so I'm rather pleased to have been able to keep on target with it .


I'm not sure if they should have grey horses ? - they did in the Crimea , but what little pictorial evidence I can find seem to show various shades of brown during the Franco-Prussian War - I decided to give the officers grey ones  in the end.


Foundry do dismounted cavalry figures - but they are a lot chunkier that the Spencer Smith figures , but being in separate units and not mixed they may have to do as I would like to have the option to dismount the cavalry units .